Baby Hop Plants
For more information related to initial care and planting of baby hop plants, please refer to this guide.
Hop rhizomes are rootstock
Cuttings are taken from mature hop plants that can be used to propagate new hop plants. As a perennial plant, hops will grow back year-after-year producing cones for harvest in the late summer. Rhizomes are typically planted in the Spring as soon as the soil is workable.
Rhizome Care – Pre Planting
Rhizomes are a living hop root, and should be kept moist until planted. If left submerged in water, or completely dry, it can be challenging for the plant to survive. It is recommended that rhizomes are misted occasionally to maintain proper moister levels. If the ground is not workable when the hop rhizome is received, we recommend rhizomes be kept in a cool, dark, and moist space. Do not expose the rhizomes to freezing temperatures before they are planted.
Planting Hop Rhizomes
Hop rhizomes can be planted as soon as the soil is workable and the last threat of a solid frost has passed. While rhizomes are hardy and can survive a light frost, if the ground freezes solid shortly after being planted it can decrease likelihood of survival. Many customers prefer to first pot the rhizomes for a few weeks, and then transfer to the ground after solid growth in the pot has occurred.
It is recommended that hops are planted in places with close to full sun exposure.
Rhizomes can be planted in 3-5 inches below the surface, laying flat with growth heads pointing toward the sky. Hop plants should be planted at least three feet apart, with a wider gap between different varieties to help prevent tangling.
While the plants are in their first year their root systems are underdeveloped, so keeping them regularly watered will help with their growth.
If your soil doesn’t thaw within a week or two after your hop rhizomes arrive, or if your soil stays saturated for several weeks after it thaws, we recommend you pot your hop rhizomes until later in the spring. Potting the rhizome will help the plant to get started, and increase the first year growing cycle.
Ideal Soil For Hop Plants
Hop plants enjoy a well fertilized, nitrogen-rich soil that has a pH range between 6.0-8.0. Soil should be well drained, to prevent stagnant water from sitting on the hop plant’s roots and causing rot.
Creating A Hop Trellis
Hop trellises can take many different shapes and sizes. While first year hop plants very rarely grow to full height and typically do not yield many cones, it is still critical to give the plant a string or trellis to grow on. Strong vertical growth encourages the plant to develop strong roots underground as well, which are important for winter survival and larger yields in year 2. Hop plants will grow up to 20 feet tall, and will benefit from a structure that can support this growth. Mature hop plants can weigh over 20lbs per plant, so making a strong structure will help keep your hops off the ground. Our twine and clips are a great tool for home growers to create a trellis system for the plant to grow on.
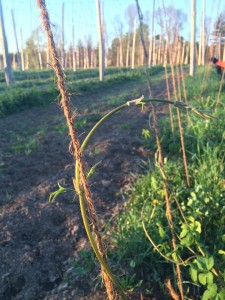
Training Hop Plants
Hop plants typically emerge with the first spring plants. At this point, commercial growers will have their own pruning and training schedules, but for small yards it is advisable to select the 3-5 shoots per plant and train them onto your string in a clockwise fashion. Pruning back all other growth shoots will encourage the plants energy to be focused on those 3-5 shoots you have selected.
Watering Your Hops
Regular watering will encourage vibrant growth, especially during their first year in the ground. This means keeping the soil moist, but not saturated. It is important to let the soil drain between watering cycles.
Hop Pests and Disease
Keep an eye on your hops throughout the year, as they are susceptible to pests and disease like any other plant. Depending on how many plants you have in the ground, your management approach will vary. Aphids, spider mites, and leaf hoppers are common pests you may find in hops.
Harvesting Hop Cones
Harvesting is the process of removing the hop cones from the rest of the plant. It is often easiest to cut the entire plant down and remove it from the trellis before harvesting. Because first year hops are focused on building their root system, very few cones (if any) should be expected from the plant. In subsequent years, plants will produce hundreds or even thousands of cones when properly taken care of.
It often takes about an hour to hand harvest a mature hop plant, so be sure to have some friends around when the time comes!
There are many ways to determine the right time for harvesting your hops. The easiest way is to use your sense of touch and smell. when the hop cones feel dry and papery, and smell vibrant and aromatic then it is likely time to pull them from the plant. Once the cones have been harvested many home brewers will put them right into a beer, while others will dry them first.